How to install CentOS EPEL repo, this tutorial walks you through the process of installing the EPEL Repository on versions 4, 5 & 6 of CentOS Linux. The EPEL repository gives you access to a large catalog of RPM’s which allows you to install unsupported software, such as a different version of PHP or a package that does not exist in the official repos.
Debian Asterisk 10 Source Install Guide
The following tutorial walks you through the process of installing Asterisk 10 on Debian 6 (Squeeze), the install method uses source directly from asterisk.org not the Debian packages via APT. I recommend installing Asterisk on a dedicated server running a minimal Debian 6 system with nothing else installed apart from SSH and always keep your base system up to date.
Make sure Debian is up to date with:
1
| |
Apt will now pull down and install any updates.
Install Debian Asterisk 10 dependencies and the required build tools with:
1
| |
Create a build directory in /usr/src for Asterisk:
1
| |
Change into the directory:
1
| |
Download Asterisk 10 and the DAHDI tools using wget:
1 2 | |
Extract Asterisk 10 & DAHDI tools tar.gz archives:
1
| |
Next we must build DAHDI tools on Debian, this must be done first before building Asterisk 10, enter the following:
1
| |
Build DAHDI tools with:
1 2 3 | |
Start DAHDI tools on Debian with:
1
| |
Build Asterisk 10 on Debian 6
It’s time to compile Asterisk 10 on Debian 6 with the following:
1
| |
Build Asterisk 10:
1 2 | |
When this finishes you should get the funky Asterisk ASCII text logo:
1 2 3 4 5 6 7 8 9 10 11 12 13 14 15 16 17 18 19 20 21 | |
To customize your Asterisk build use menuselect, you can add additional codecs and other features:
1
| |
Make Asterisk 10:
1 2 | |
Make Asterisk 10 samples, do not do this if you are upgrading or already have Asterisk config files in /etc/asterisk
1 2 | |
Start Asterisk console with, this is for testing only:
1
| |
To start the Asterisk service on Debian:
1
| |
You should now have a working Debian Asterisk server with a set of default config files installed, each config has examples for configuration. I recommend setting up your internal extensions first and then your internal / external trunks.
Debian with a source install of Asterisk is my prefered choice, make sure you note down that asterisk is installed from source and keep it up to date, I would recommend joining their mailing list.
If you found this Asterisk 10 Debian 6 install tutorial helpful, please share it below.
PHP 5.3 CentOS 6 Install / Upgrade
This guide shows you how to install PHP 5.3 on CentOS if you already have PHP 5.1 installed on then you need to remove it before install installing php53 via YUM.
CentOS Set Default Gateway
How to set the default gateway (route) this tutorial shows you the command line method of setting the default gateway on CentOS.
Edit Crontab Tutorial
This guide walks you through the process of editing the crontab file, the default way to edit crontab on most Linux systems is Vi, love it or hate it Vi is a part of Linux head over to our Vi Commands section if you need any help.
How to edit a cron job on Linux systems
To edit the crontab or add cron jobs is done via the crontab command below are the three basic crontab commands you need to know:
Edit crontab command
Allows the user to edit their own crontab file, once open you can edit, delete or add cron jobs. On Ubuntu the first time you run this command it prompts you to chose a text editor – on other Linux systems it normally uses Vi.
1
| |
Edit another users crontab
Allows the root user to edit crontab for another user.
1
| |
How to list cron jobs
The -l option is used to list cron jobs, is will show all jobs for the current logged in user – again if you are root you can postfix this with a username to show cron jobs for that user
1
| |
How to delete a cron job
This wipes the crontab file (be careful when editing crontab files as the r key is next to the l key on the keyboard!), if you wish to delete / erase a users crontab you can do so with the -u option.
1
| |
Head over to our crontab syntax tutorial if you require any additional help or crontab examples.
Linux YUM Tutorial
Ultimate Linux YUM tutorial, YUM is used on a number of Linux distributions such as Redhat RHEL, CentOS & Fedora. YUM uses repositories of RPM packages to download and install new software for your server, Linux Admin’s must learn YUM so they have an understanding of adding / removing packages on Linux systems and maintain up to date secure Linux servers.
The instructions for YUM should be the same for each Linux distro CentOS, RHEL or Fedora.
How to update all RPM packages with YUM
1
| |
Update a single installed RPM package with YUM
1
| |
Install RPM packages with YUM
1
| |
Exclude a package from being updated with YUM
Say for example you want to update your system but you do not want the kernel to be updated…
1
| |
How to check what packages need updating using YUM
This command checks all packages on Fedora, CentOS or RHEL to see if they need updating.
1
| |
Uninstall Packages using YUM
1
| |
Or…
1
| |
List information about about Packages with YUM
The next step in our Linux yum tutorial is to find out more information about packages with use “yum list” it is best used with a package name, otherwise it will list info about all the packages in the YUM repos you have installed ;)
1
| |
Yum – Find out what a package does
For example if you want to find out what the httpd package does…
1
| |
Which should display something similar to the following:
1
| |
Search for a package with YUM
If you don’t know the name of the package search for it, this will search through the RPM’s info looking for the string you have provided. Say for example I want to find the package name for Bacula but I don’t know the name of it, I would enter the following:
1
| |
Which would give me the following out put:
1 2 3 4 5 6 7 8 9 10 11 12 13 14 15 16 17 18 19 20 21 | |
Note if you search for something like apache, then you are going to get a huge list of packages so you might want to use the less or more command to allow easy scrolling of the output.
List yum Package info for a package
This is my favorite way of listing package info with yum, personally I do not use list I always use info, below is an example of the yum info command with httpd.
1 2 3 4 5 6 7 8 9 10 11 12 13 14 15 16 17 18 | |
How to clean up the yum cache and downloaded packages
Everytime you install packages with yum it downloads an RPM and installs it, over time these RPM files can take up a lot of space… To clear up yum enter:
1
| |
How to use YUM to install local RPM files
Say for example you need to build your own RPM and install it locally you can use YUM to resolve dependancies this package might have from it’s repositories by using the following:
1
| |
Use YUM to update a local RPM package
If you want to update a local rpm package using YUM enter the following:
1
| |
Find out what dependancies an RPM package has
How to find out what deps a package has using yum, might be handy if you need to do a source install for something (shame on you!). deplist will show you what the package depends on and what packages provide them.
1
| |
Linux YUM Priorities
If you have a bunch of different repos installed on your system like the EPEL repo and you want to make sure when you install a package or update your system the packages come from the base system first if they don’t exist there then use a 3rd party repo. I would recommend you go follow our guide on How to use YUM priorities and check this guide out if you need instructions on how to install the EPEL repo.
Find out what version of YUM you have installed
1
| |
Install packages into a chroot with YUM
If you need to install packages into a chroot with YUM then use the following:
1
| |
Enable a disabled YUM repository on the command line
If you have a repo installed and you need to enable that repo to install a package, you can enter:
1
| |
The above example would install rsnapshot from the epel repo if you had it installed but disabled.
Disabled a YUM repository on the command line
If you have a repo installed and you need to disable that repo to prevent yum from installing a package form it, you can enter:
1
| |
YUM Groups
A yum group is a collection of RPM packages for a specific purpose such as “Development Tools”. This guide shows you how to use yum groupinstall to list available yum groups and install / update / remove yum groups.
yum groupinstall (install a yum group)
1
| |
yum groupremove (remove a yum group)
1
| |
yum groupupdate (update a yum group)
1
| |
yum groupinfo (list packages in a yum group)
1
| |
List YUM groups
1
| |
YUM List installed packages
How to YUM list installed packages on Linux, this should work on all Linux YUM distro’s such as CentOS, Fedora, RHEL etc.
To list all installed packages via YUM it’s as simple as entering:
1
| |
This will display installed packages similar to the output below (the screen shot is a list of installed packages on a CentOS 6 server):
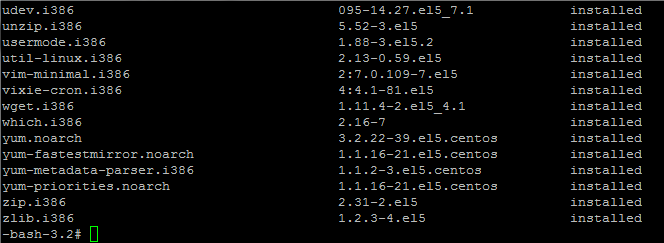
The output from yum list installed is often rather large so you might want to pipe it through more:
1
| |
I hope you have found this Linux YUM tutorial useful and if you can think of any other handy tips drop me a comment! And don’t forget to follow us on Twitter.
How to Install CentOS 6 Linux for Servers & Desktops
How To Install CentOS 6
Step by step guide to on how to install CentOS 6 Linux (in this case 64 bit) from scratch on a new machine, the install type is minimal which is perfect for servers, no GUI will be installed and the installation will be as lean as possible.
Stop, Start & Restart Cron on Linux
This guide covers how to stop, start and restart cron on Linux systems, the following examples will show you how to restart the cron daemon on almost any distro.
How to restart cron on Linux
To restart cron make sure you are the root user (or sudo on Ubuntu) and run the following command:
1
| |

How to start cron daemon
To start cron daemon on Linux enter the following:
1
| |
The cron daemon will now start.
How to stop cron daemon on Linux
To stop the cron daemon on Linux systems enter:
1
| |
The cron daemon will now stop, this means that all your cron jobs will also not run as scheduled – if you found this on how to restart cron on Linux you might find our cron syntax guide useful.
Crontab Every 5 Minutes
How to run crontab every 5 minutes detailed instructions and a Linux crontab example showing you how to run a cron job every 5 minutes.
Below is an overview of how the crontab file format, for a more detailed explanation visit our crontab syntax page.
1 2 3 4 5 6 7 | |
Edit your crontab with:
1
| |
To run crontab every 5 minutes add the following to your crontab file:
1
| |
The same applies if you want to run the script directly from the crontab, see the example below:
1
| |
The above would run crontab every 5 minutes and search the mail log for darth vader and email me the output (note this would send the email regardless if it found darth vader or not).
Crontab Syntax Tutorial With Examples
At first crontab Syntax appears very cryptic, a set of numbers followed by a command making it hard to remember what each number represents. This tutorial explains the crontab format and the easiest method to remember the syntax of the crontab file.
Crontab Syntax Chart
1 2 3 4 5 6 7 | |
Crontab example
1 2 | |
The above cronjob would run every half an hour from Monday to Friday. The following table should help you understand crontabs six field format, starting at the left and working across to the actual command / script.
Field Possible Values
1 2 3 4 5 | |
An alternative to the six field crontab syntax would be the two field option which consists of two fields the date / time and the actual command for example to send an email of everyone who has logged into your Linux server everyday you would use the following Crontab entry:
1
| |
Here is a list of the most common @ options for Cron:
1 2 3 4 5 6 7 8 9 10 11 12 13 | |
Additionally there are often a number of directories you can drop your scripts into located in the /etc directory such as /etc/cron.daily – but this tutorial focuses on the crontab file.