LinuxMoz

Linux Stuff && Coffee

Ubuntu 12.04 Download

| Comments

The Ubuntu 12.04 Download links below are for the x86 & AMD64 (64 Bit) versions of Ubuntu 12.04 Beta the mirrors below are fast.

UBUNTU 12.04 FINAL RELEASE MIRROR LINKS BELOW

Ubuntu 12.04 Download

This article is designed as a quick reference so people can quickly and easily find Ubuntu 12.04 download ISO’s for i386 & AMD64 for both Desktop & Server – we recommend following our how to upgrade to ubuntu 12.04 if you are upgrading via apt-get.

Ubuntu 12.04 Download ISO Links

Below are the direct links for the Ubuntu 12.04 download – this is the final release download of Precise Pangolin (12.04) the latest LTS (Long Term Support) version of Ubuntu.

As soon as the final release is posted later I will update the mirror links below, for now the best option is to install the final release and apt-get update to final release of 12.04. 

Ubuntu 12.04 Desktop Download

The ISO links below will download the Desktop version of Ubuntu allowing you to run Ubuntu on your laptop or PC to try it out, this does not affect any of your installed files or operating systems. You can also install Ubuntu 12.04 from this ISO by clicking the install icon on the desktop, this is often referred to as the Ubuntu Live CD.

Desktop Intel x86 (i386)

Desktop AMD64 (64 Bit)

Ubuntu 12.04 Server Download

The links below are for the Ubuntu 12.04 Server Download ISO.

Server Intel x86 (i386)

Server AMD64 (64 Bit)

Ubuntu 12.04 Alternate Download ISO

The Alternate ISO is often referred to as the Ubuntu Advanced Install ISO and is used for specialist installations as it allows more customization during the install process. If you need to setup LVM / RAID, Automated deployments or if you’re installing on a computer with less than 384Mb of RAM.

Alternate Intel x86 (i386)

Alternate AMD64 (64 bit)

I will be updating the Ubuntu 12.04 download links in this post as the release progresses to make sure they stay current, you may also be interested in our other Ubuntu Tutorials.

Ubuntu Google Chrome Install on LTS 10.04

| Comments

Ubuntu Google Chrome Install using the GUI on Ubuntu 10.04 LTS.

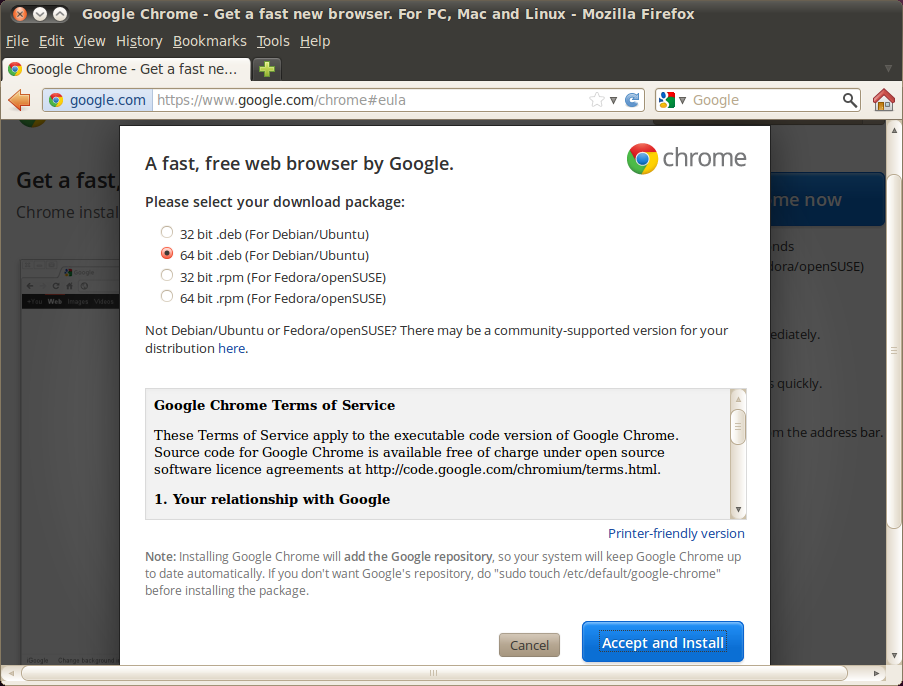
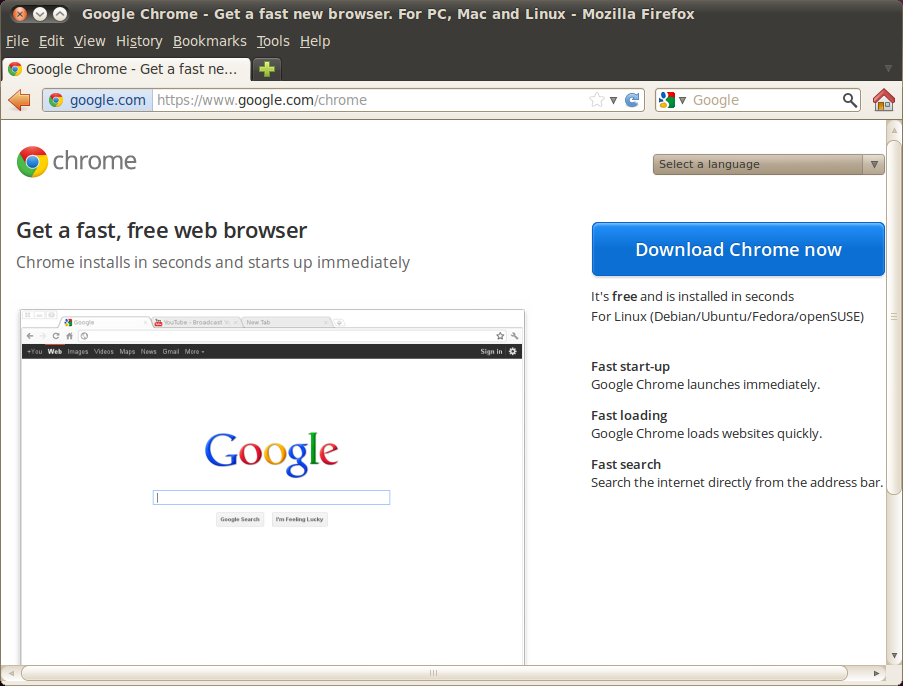
To start off with download Google Chrome for Ubuntu from https://www.google.com/chrome

Ubuntu Google Chrome Download Page

Accept the agreement (read it first).

Ubuntu Google Chrome Download - Accept Agreement

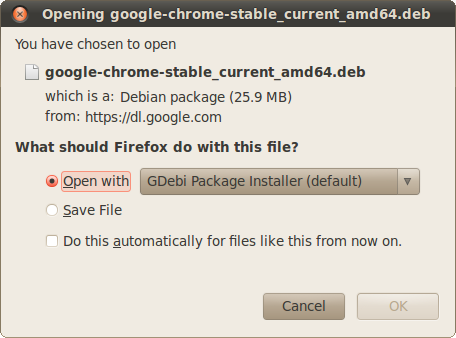
Open the package with the GDebi package install (default option).

Open Google Chrome .dpkg with GDebi

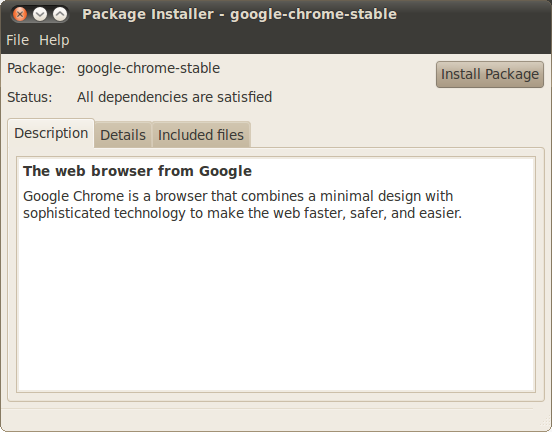
Click Install Package and enter your password to begin the Ubuntu Google Chrome install

Install Google Chrome  .dpkg Ubuntu

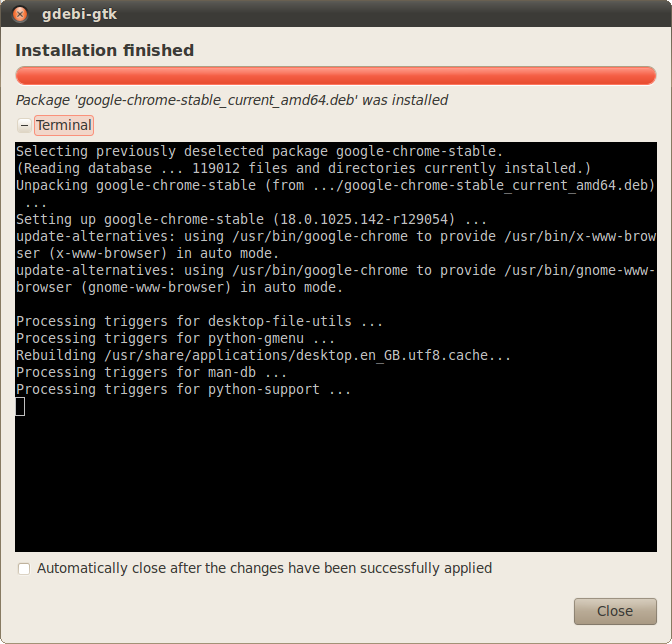
The installation will take place, click close when it completes

Ubuntu Google Chrome Installation

You can run Google Chrome from the Internet menu in the Applications menu.

Enjoy.

Ubuntu Server GUI Install Tutorial

| Comments

How to install the Ubuntu Server GUI on a server without an X Windows interface Gnome, this tutorial will assume you have a fully up to date version of Ubuntu LTS 10.04 and is a copy and paste tutorial for installing the Gnome Ubuntu Server GUI.

Ubuntu Server GUI minimal install

The following command will install just a working Gnome desktop without all the additional desktop software that normally comes with an Ubuntu desktop, if you want to install a full Ubuntu desktop see below.

1
apt-get update
1
sudo apt-get install ubuntu-desktop --no-install-recommends

Ubuntu Server GUI Install

Optionally you can install the various Applets that you see at the top of the screen showing network status etc.

1
sudo apt-get install applet-complete indicator-applets

Ubuntu Server GUI install Applets

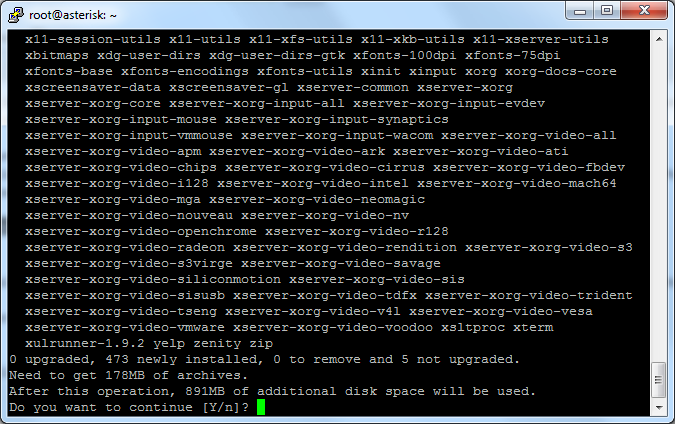
This will pull all the packages and ask you to confirm, see screenshot below:

Press Enter to continue.

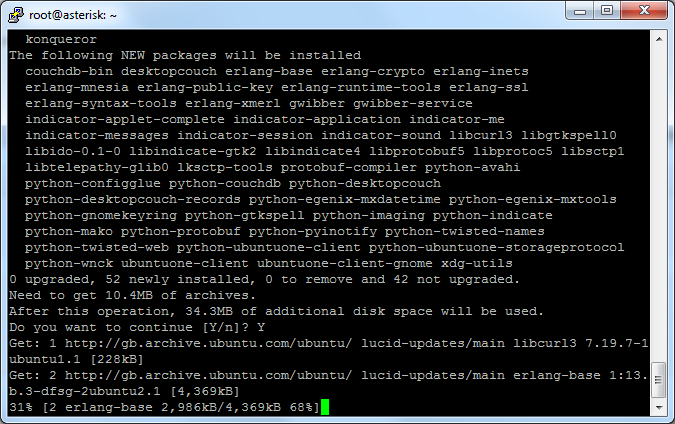
This step could take a while depending on your computers speed / Internet connection speed.

If your GUI does not start automatically restart the GDM service on Ubuntu:

1
/etc/init.d/gdm restart

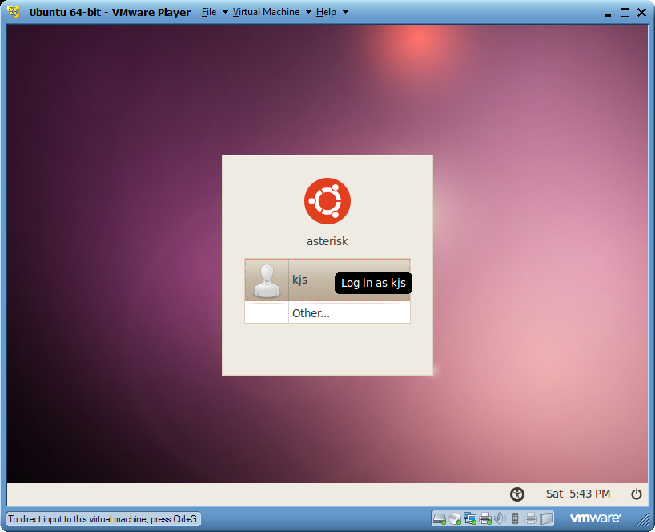
Ubuntu Server GUI

You should now have a fully functional Ubuntu Server GUI, if you wish to install a full Ubuntu Desktop then enter the command:

1
sudo apt-get install ubuntu-desktop

This will pull all the additional apps that are normally installed on an Ubuntu Desktop.

Recursive Grep Command - Recursively Search Through Directories

| Comments

How to perform a recursive grep on Linux, allowing you to search through files / sub directories for a specific string.

How to grep recursively

1
grep -r SEARCHSTRING /home/*

Enter your own search in the SEARCHSTRING above…

Say for example I am searching for the string class=“author” located somewhere in /var/www/wp-content/themes/your-theme. I would type the following at the shell prompt:

1
grep -r class="author"   /var/www/wp-content/themes/your-theme/*

Grep will then output the string found in the file on the right and the file it’s located in on the left.

Example:

1
2
grep -r sub_rss    theme/*
theme/lib/functions/widgets.php:                   "sub_rss"

Note in the example above I am searching for the string sub_rss in the dir themes.

Apache Remove SSL Password on Restart

| Comments

How to remove the Apache SSL password prompt when restarting / starting the Apache service on Linux.

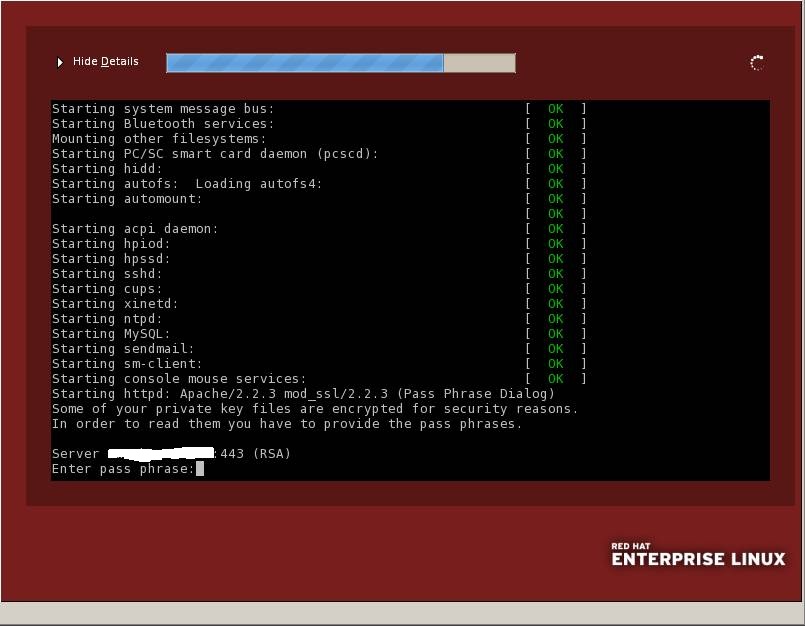
Apache prompt when restarting the service:

1
2
Some of your private key files are encrypted for security reasons.
In order to read them you have to provide the pass phrases.

Apache SSL Password Prompt

The best way to stop Apache prompting for the SSL certificate password is to remove the SSL password from the certificate that Apache is using.

Remove SSL password Apache

Enter the following as root:

1
openssl rsa -in blah.com.key -out blah.com.key.nopass

You will now need to point you Apache vhost config at the above key and do a test restart to make sure the service does not prompt for a password.

[Warn] _default_ VirtualHost Overlap on Port 80, the First Has Precedence Apache

| Comments

When restarting Apache (or httpd service) if you get the following Apache error: [warn] default VirtualHost overlap on port 80, the first has precedence on Linux (CentOS, Ubuntu, Fedora, etc) chances are you are configuring vhosts or adding additional virtual hosts to your Apache config.

You are probably seeing an error similar to the following:

1
2
3
[root@server ads]# /etc/init.d/httpd restart
Stopping httpd:                                            [  OK  ]
Starting httpd: [Fri Mar 23 07:55:04 2012] [warn] VirtualHost 192.168.1.2:80 overlaps with VirtualHost 192.168.1.2:80, the first has precedence, perhaps you need a NameVirtualHost directive

Fix Apache Error: [warn] default VirtualHost overlap on port 80, the first has precedence

[warn] _default_ VirtualHost overlap on port 80, the first has precedence Apache To fix the Apache error message [warn] default VirtualHost overlap on port 80, the first has precedence Apache you need to open the file httpd.conf file in Vi and add the following line:

1
vi /etc/httpd/conf/httpd.conf

Add the following:

1
NameVirtualHost *:80

You then need to configure your vhosts as follows:

1
2
3
4
5
6
7
8
9
  ServerName linuxmoz.com
  ServerAlias *.linuxmoz.com
  ServerAdmin [email protected]
  ErrorLog /var/log/httpd/linuxmoz.com-example.err
  CustomLog /var/log/httpd/linuxmoz.com.log combined
  DocumentRoot /var/www/linuxmoz

    Order allow,deny
    Allow from all

*note the :80 – this means it will run on any IP address configure on your server.

If you need to run the vhost on a specific IP address use the following:

1
NameVirtualHost 192.168.1.2:80

Obvious replace the IP with your servers IP address, you also need to reconfigure your vhost files to use the IP address.

If you restart Apache / Httpd you should now see:

1
2
Stopping httpd:                                            [  OK  ]
Starting httpd:                                            [  OK  ]

Your formatting may differ the above was taken from a CentOS Apache restart, your may fine this Centos install Apache guide useful.

The Apache error message [warn] default VirtualHost overlap on port 80, the first has precedence should now be sucsessfully fixed.

Gvfs Permission Denied - Rsync, Tar Backup

| Comments

If you are trying to backup a Linux system using rsync or tar you will probably get an error like .gvfs permission denied file in a users home dir causing an rsync backup to fail, you error will look similar to:

.gvfs permission denied

1
2
3
4
5
6
7
receiving file list ... rsync: readlink_stat("/home/username/.gvfs") failed: Permission denied (13)
done
username/.xsession-errors

sent 42 bytes  received 1746118 bytes  36003.30 bytes/sec
total size is 31178158898  speedup is 17855.27
rsync error: some files could not be transferred (code 23) at main.c(1298) [generator=2.6.8]

Delete .gvfs file Linux

Your best option is to exclude this file from your backup, however if you need to delete the .gvfs then you can do so with the following:

1
2
umount /home/username/.gvfs
rm -rf /home/username/.gvfs

Either options should resolve the problem and your tar / rsync backup should now function again as expected.

LVcreate Example: Create Logical Volume Linux

| Comments

This tutorial provides a lvcreate example showing you how to create a logical volume in Linux. The examples below assume you have free space in your existing Logical Group (LG for short), the operating system I am creating the LV’s on is CentOS however this should work on any other linux distro Ubuntu, Debian etc however you may find other distros structure the way they create LG’s and LV’s differently. Fedora, Redhat, CentOS should keep a similar structure to below.

lvcreate – create logical volume called backups

lvcreate logical volume

The lvcreate example below will create a logical volume with 120Gb Logical Volume called “backups” in Volume Group “vg00” (to find out what you VG is called run “vgdisplay”).

1
lvcreate -L 120G -n backups vg00

Create file system on Logical Volume

To create a ext3 filesystem on the new logical volume you just created, run the following:

1
mkfs.ext3 /dev/vg00/backups

You probably want this partition to be auto mounted at boot, so create the /etc/fstab entry for /backups:

1
/dev/vg00/backups       /backups        ext3     defaults,usrquota       0 2

Create mount point for Logical Volume in Linux

Don’t forget to create the mount point!

1
mkdir /backups

Test this mounts before you reboot to avoid a failed startup… The last thing you want if you are working remotely.

1
mount /backups

The curser should drop to the line below, like so:

1
2
[root@darthvader ~]# mount /backups
[root@darthvader ~]#

That’s all there is to creating a logical volume with lvcreate, formatting it with an ext3 file system and mounting it at boot.

Apt-get Install Package

| Comments

How to apt-get install packages on Ubuntu, Linux Mint & other Debian based Linux distros, apt-get is the package management system that allows you to install packages (software) on Ubuntu, Debian & Linux Mint.

The following command will install the Apache 2 package:

1
apt-get install apache2

apt-get install package

apt-get will pull down all the dependencies and other packages required, however in the above example you can see the package apache2 is already installed after running the command apt-get install package-name if you see anything in the upgrade section this means the package is already installed but need to be updated.

If you are unsure what the package name is you can perform an apt-get search using the apt-cache command.